How to tie a Sliding Knot
Step 1.
Cut the cord to your desired length and cross both ends of the cord.

Step 2.
Take the right end (which I will call End A) and tie a regular knot approximately 1 to 2 inches below the left end (End B).

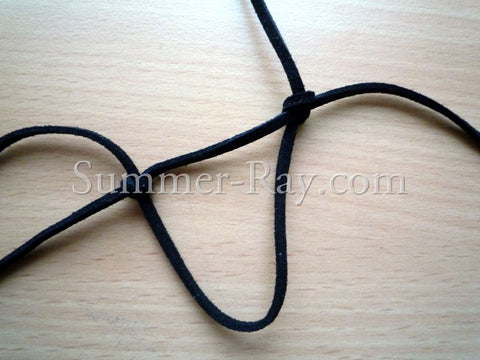
Step 3.
Tie it loosely at first and check if it slides smoothly along End B.

Step 4.
If you are satisfied, tie a double knot with the loose end of End A. You may want to tie the knots loosely at first for easy adjustments later.

Step 5.
Take End B and tie a regular knot around End A, and repeat step 4 with the loose end of End B.

Step 6.
Try sliding both knots up and down the cord. Now would also be a good time to try it on for size to see if you like the fit.
If it does not fit the way you want it to, untie the knots and repeat the process. If you are happy with the fit, tighten the knots securely. And hey presto! You're done! Have fun making necklaces, chokers, bracelets and anklets using this simple but effective technique! :-)