Washi eggs are simple and fun to decorate!
They make great gift ideas for Easter, and a unique and enjoyable craft activity at parties.
Washi means Japanese paper, and Washi eggs are egg shells covered with the paper. I attended a Washi egg workshop recently, and here are some pictures and an easy-peasy tutorial on how to make your own Washi eggs.
Firstly, you will need an egg, a pin and a bowl.

Prick a 2-3mm hole at one end of the egg with the pin, taking care not to fracture the egg shell.
Turn the egg over and make a smaller hole at the other end.
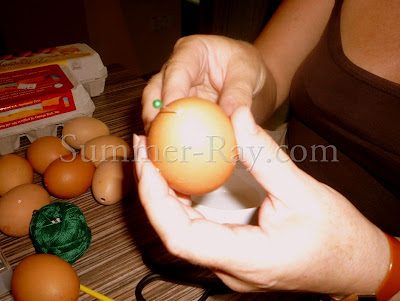 |
| Make holes at the top and bottom of the egg |
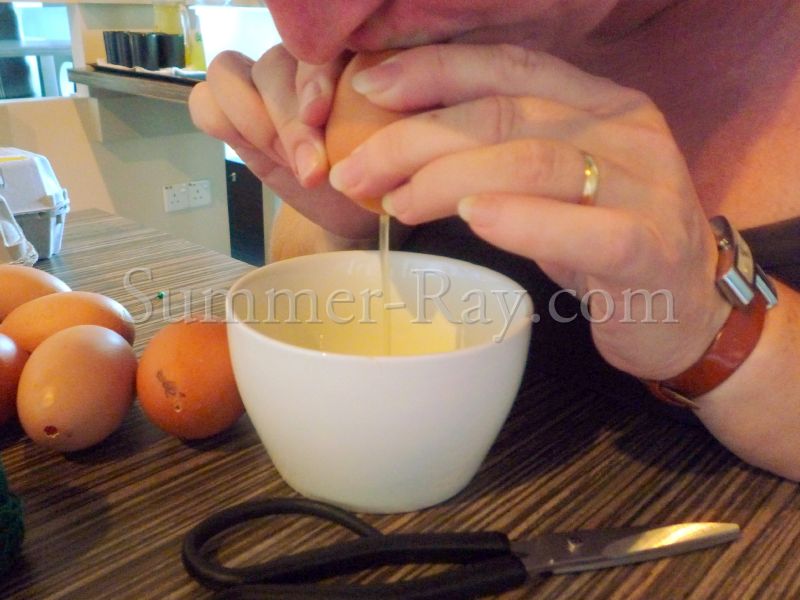
Gently place your mouth over the smaller hole and blow the egg into the bowl.
Wash or wipe the egg shell clean, and leave it to dry. (Put the egg aside to cook later) :-)
Tip: Wiggle and jiggle the pin around a little once you have made the holes, this will puncture the yolk and make it easier to blow out.
 |
| Blow the egg out of the shell |
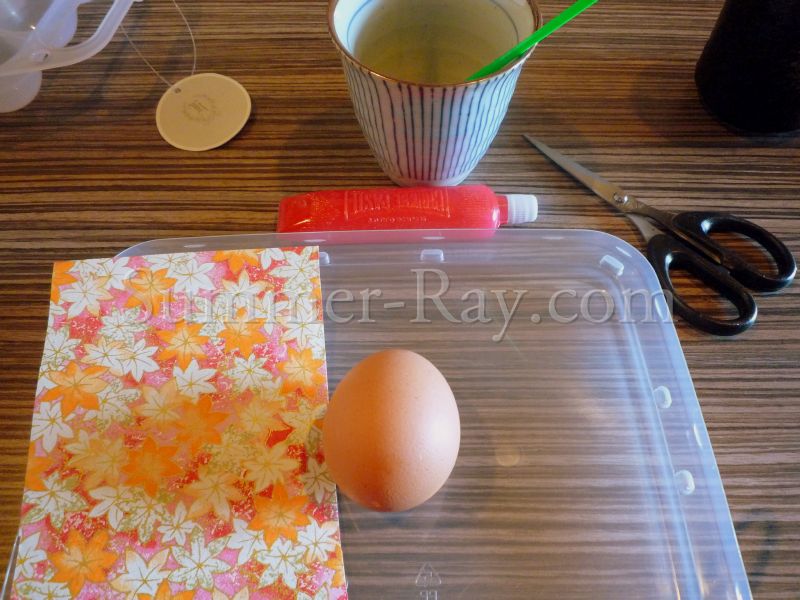
Next, you will need a pair of sharp scissors, paper glue, a cup, a brush, a plastic sheet or tray to work on, and some Washi paper cut approximately into 4" (width) x 6" (length) pieces.
 |
| My little Washi egg work station |
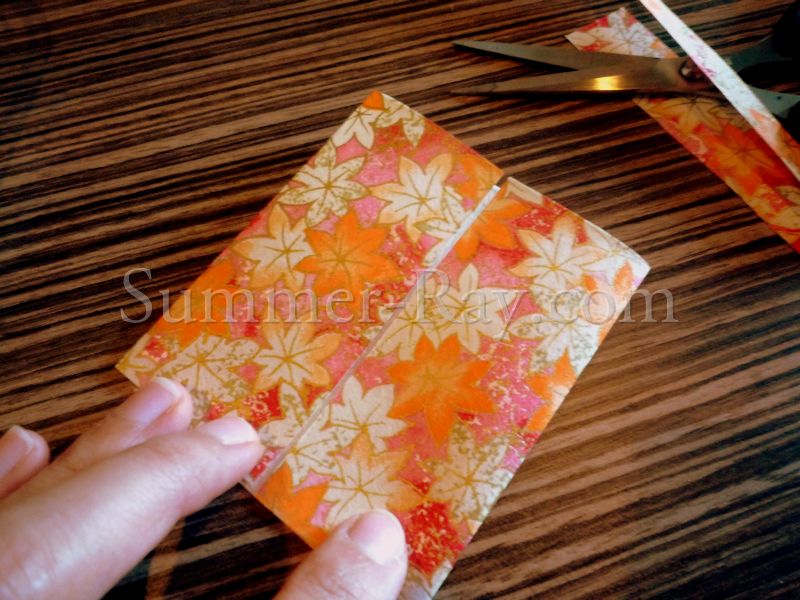
To measure the egg,
Wrap the paper lengthwise around the width of the egg.
Fold the paper where the ends meet, this is to mark where to cut later.
 |
| Measuring the width of the egg |
Next, place one end of the paper, width-wise, from the bottom of the egg to the top (tip to tip).
Fold away the excess paper at the top of the egg,
 |
| Measuring the length of the egg |
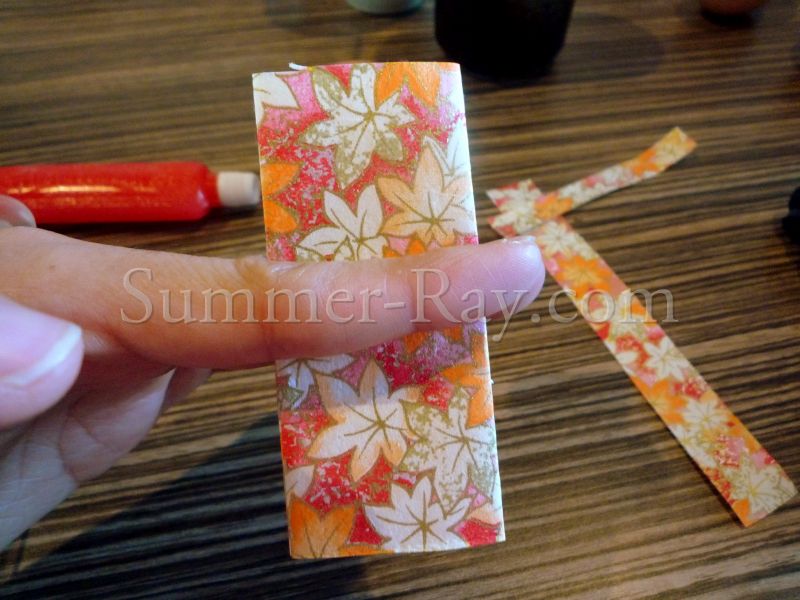
Cut the paper at the folded markings. (Do not throw the excess cut-outs away)
Tip: Washi paper expands a little when it is wet,
so there is no need to overlap the paper over the egg, just let both ends meet nicely at the width. For the length of the egg, let the ends of the paper fit nicely from the very top to the bottom of the egg.
 |
| The paper, cut to fit the egg snugly |
Then you will need to...
Fold the paper in half.
Open the paper and fold in both ends to the middle fold.
 |
| Folding the paper |
Then fold the paper in half again, and hold it with your index and middle finger at the center of the folded paper.
 |
| The fingers mark the middle of the egg |
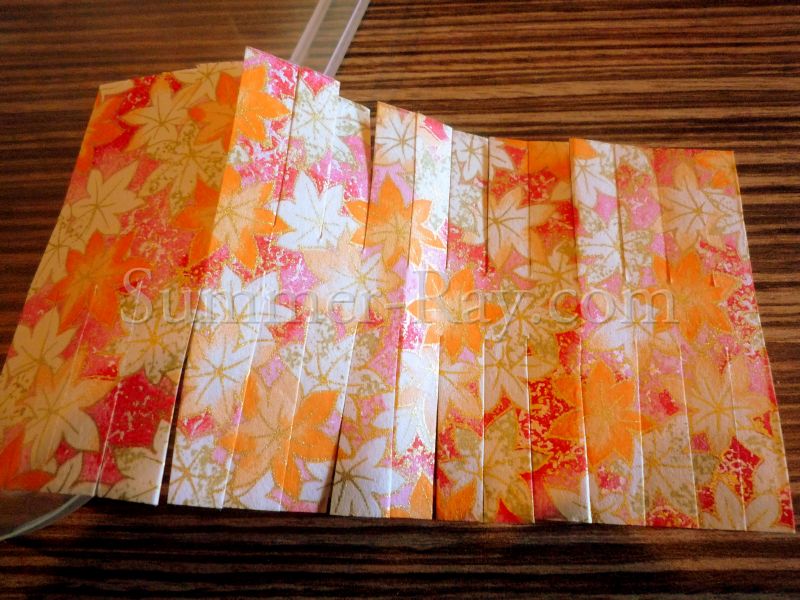
Using a sharp pair of scissors, cut one side of the paper (taking care to stop at your fingers) into 4 strips.
Do the same to the other side (remember to stop at your fingers again).
 |
| Cut 4 strips to your fingers |
Unfold the paper and cut the folds to match the rest of the strips.
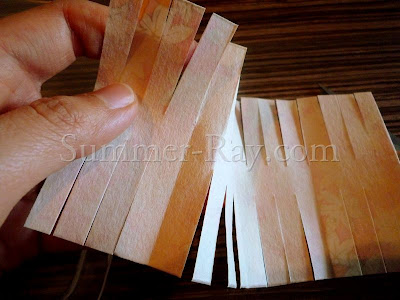 |
| Cutting the folds to complete the fringe of strips |
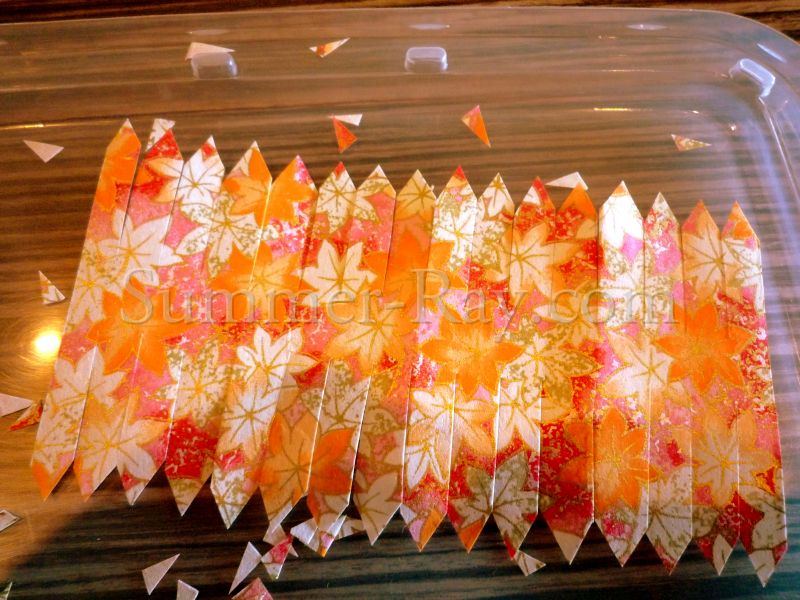
At this point, you should have a fringe of strips at both sides of the paper.
 |
| A fringe of strips at both sides |
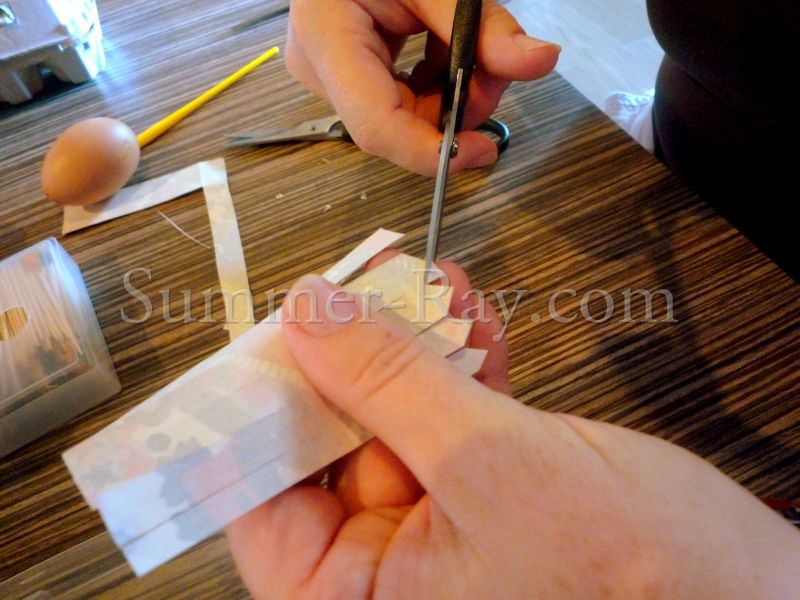
Cut the ends of the strips to make little peaks...
 |
| Cutting the peaks |
...that look like picket fences.
 |
| Picket fences |
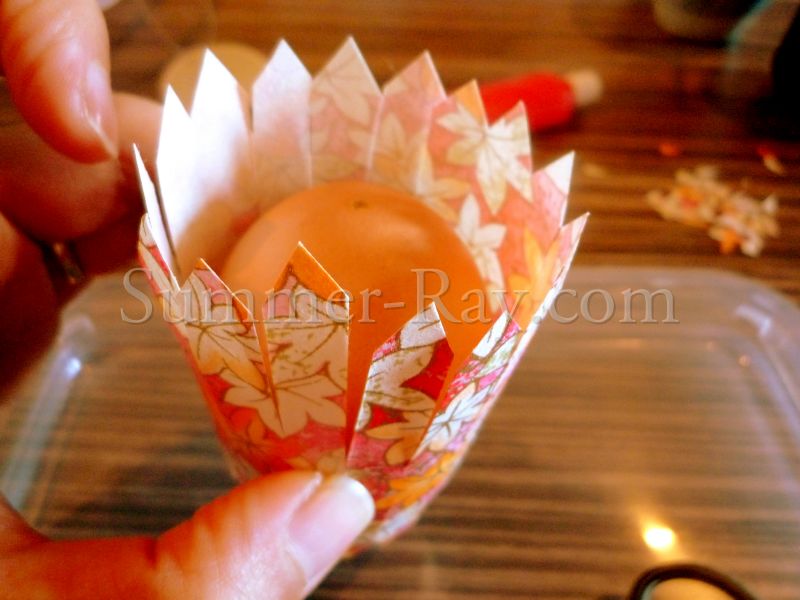
Check the fit of the paper around the egg....aaah..perfect fit! (Trim away any excess if it does not fit).
 |
| Checking the fit |
|
|
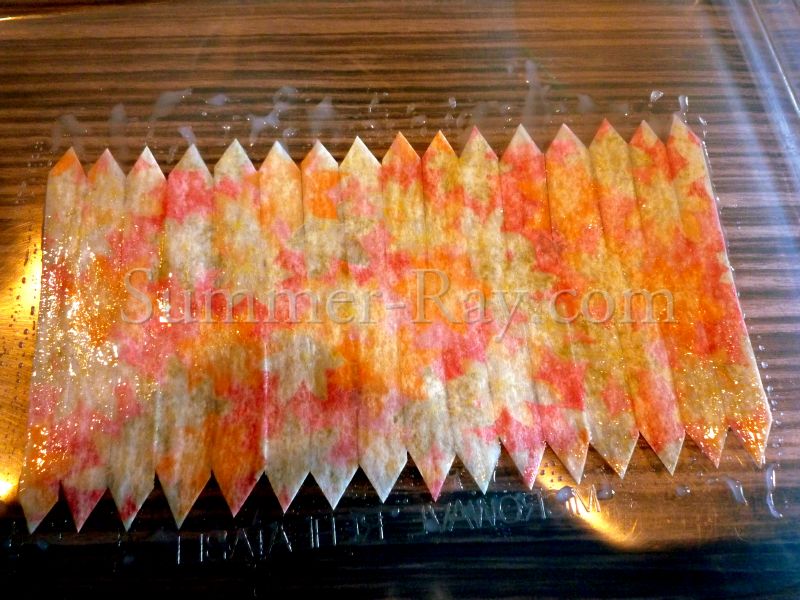
Mix a big dollop of paper glue in a cup with a little bit of water. The texture of the glue should be fluid enough to drip from the brush in nice big drops.
Place the paper onto the plastic tray and brush glue all over the inner side of the paper, taking care to cover every bit of paper from the middle to the tips.
 |
| Covering the paper with glue |
 |
| Covered completely from tip to tip |
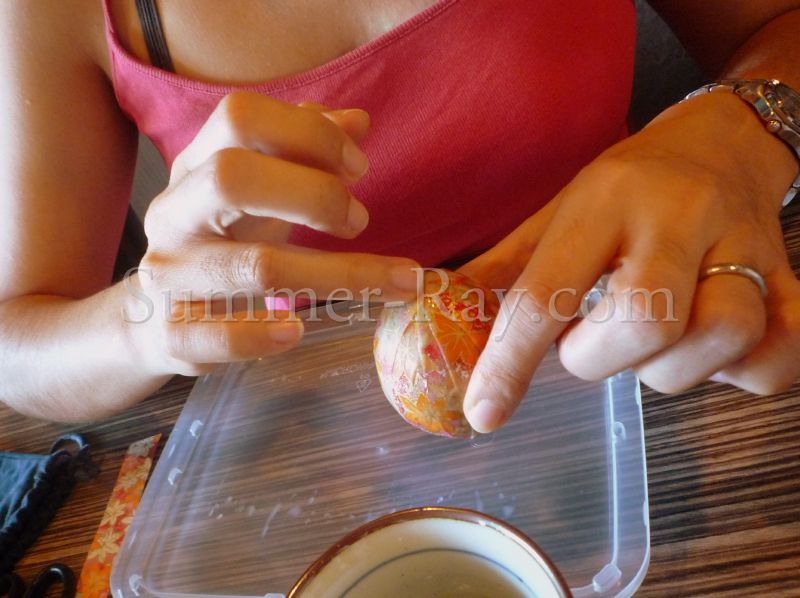
Place the egg at one end of the paper and carefully roll the paper around the egg.
Slowly press and smooth down the strips onto the egg one at a time with your fingers.
 |
| Press down the strips onto the egg |
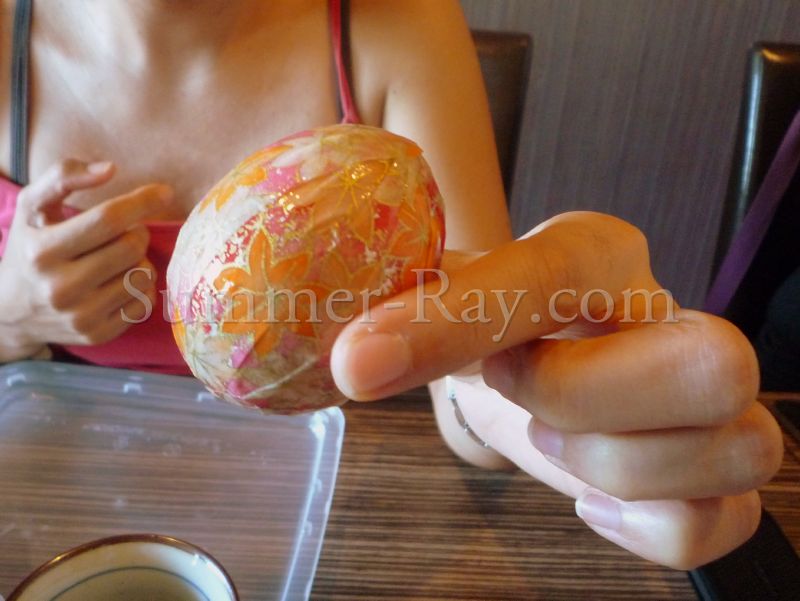
Do the same for both ends of the egg, smoothing out any bubbles or creases.
If you're not happy with the layout, peel off the strips and lay it down again the way you like.
Feel free to apply more glue anytime during the process. Just dip your finger in the glue mixture and apply generously.
 |
| Smoothing out the creases |
 |
| Almost done |
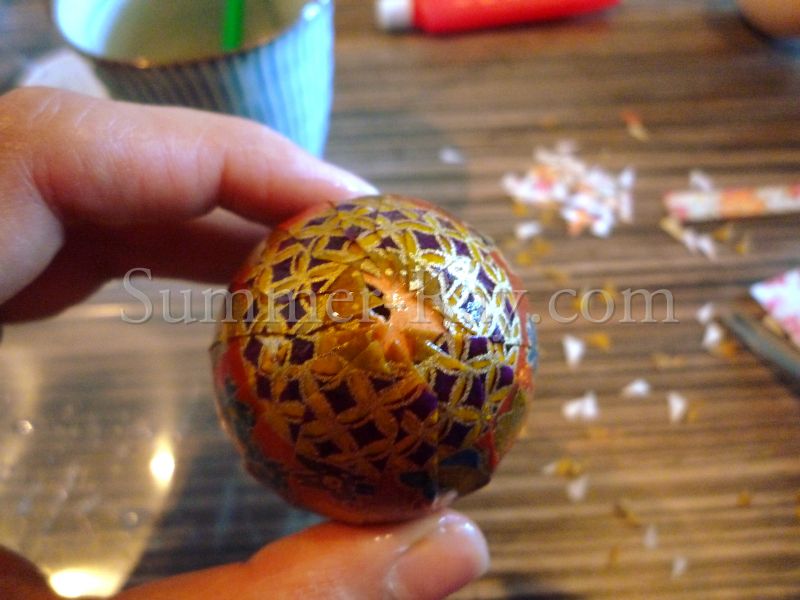
When you are satisfied, leave the egg to dry and start on your next egg.
Do not worry too much if the paper does not look as seamless as you would like, it will look better when the glue is dry.
Here are some eggs left to dry while we worked on other eggs during the workshop.
~ A little side-tracking ~
What to do when you find you cut a bit too much off the paper and it does not fully cover the egg? Worry not...the egg can be saved with surprisingly stunning outcomes.
If it is a tiny gap, push the strips into place a little harder, Washi paper is stretchable when wet and more often than not you will be able to cover that tiny gap with some adjustments.
If it is a huge gap that cannot be covered no matter how you push the strips, fret not.
 |
| A gap in the paper |
Peel open the strips
 |
| Peel away the strips |
Search through the excess paper that was cut earlier and look for the part that is the same pattern as the gap in the egg.
Cut the paper to fit the gap. If the gap covers a wide area of the egg, cut a square and snip tiny triangles around the edges, like so...
 |
| Shaping to fit the gap |
Apply glue and place the cut-out square on the egg at the area of the gap.
Press the strips back down over the cut-out square and smooth the creases away.
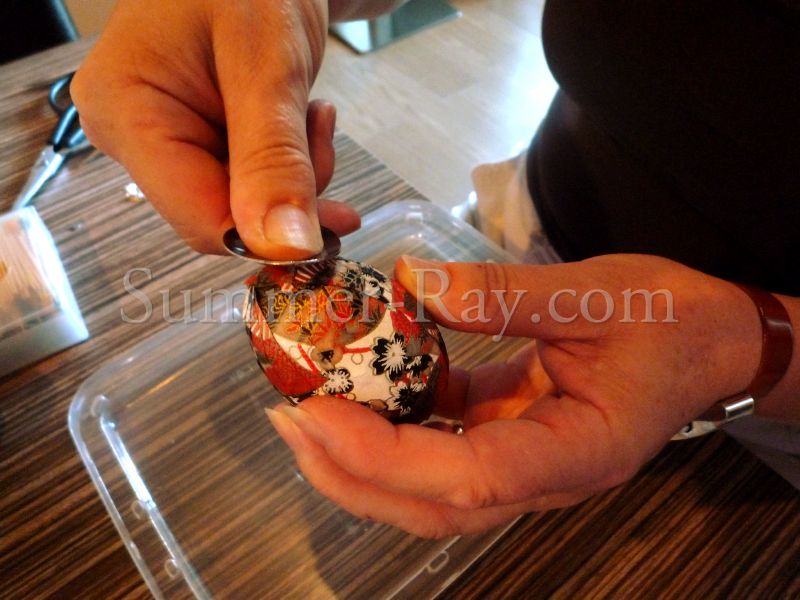
How to make a Washi egg bauble.
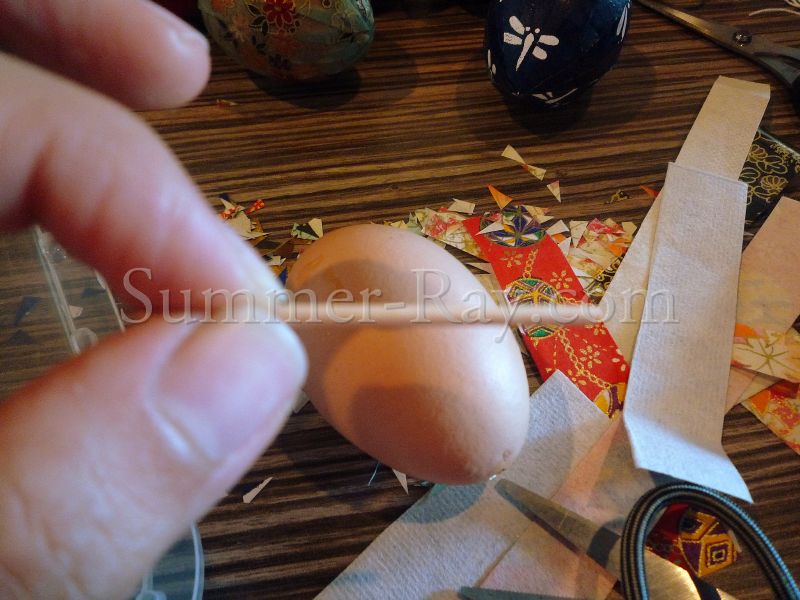
Cut off both ends of a toothpick. You should have a 2-2.5cm stick.
 |
| Cut the ends of a toothpick |
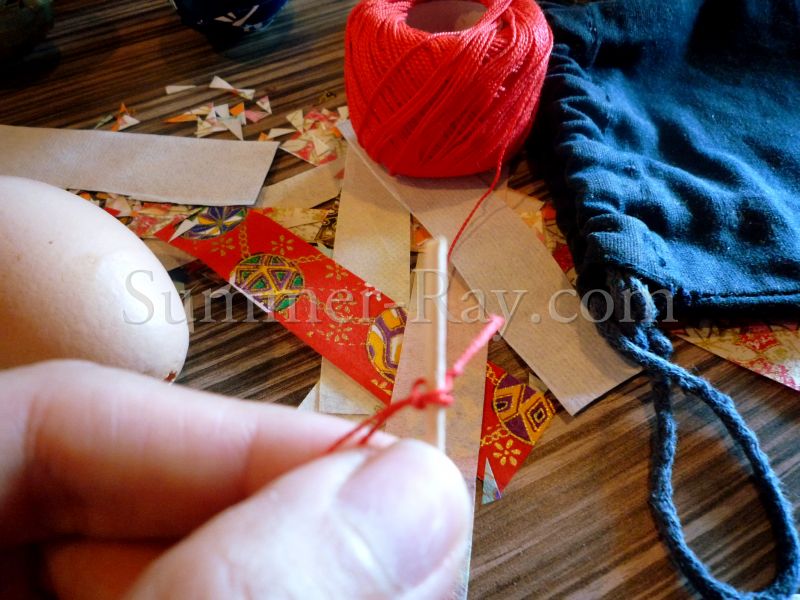
Using some thick thread, wool or cord string; tie a knot around the toothpick.
 |
| Tie a knot around the toothpick |
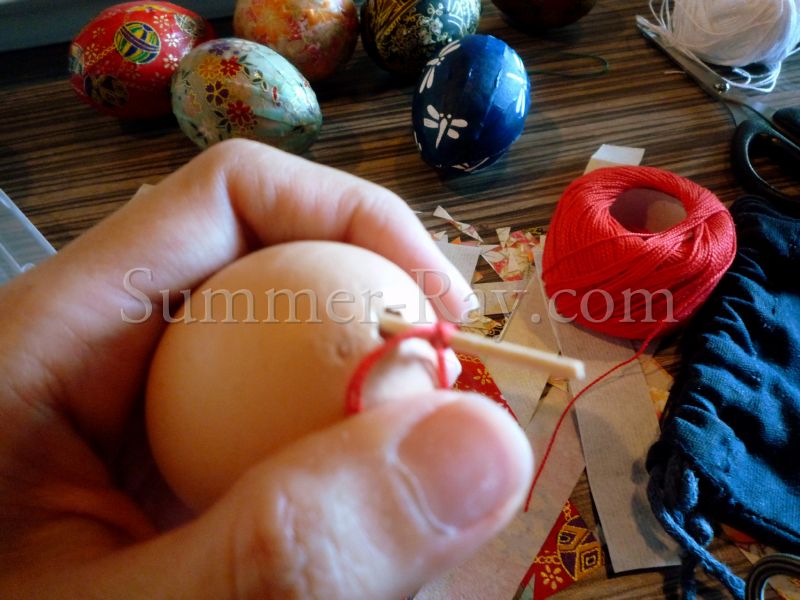
Slip the toothpick through the hole in the egg shell.
 |
| Slip the toothpick into the egg shell |
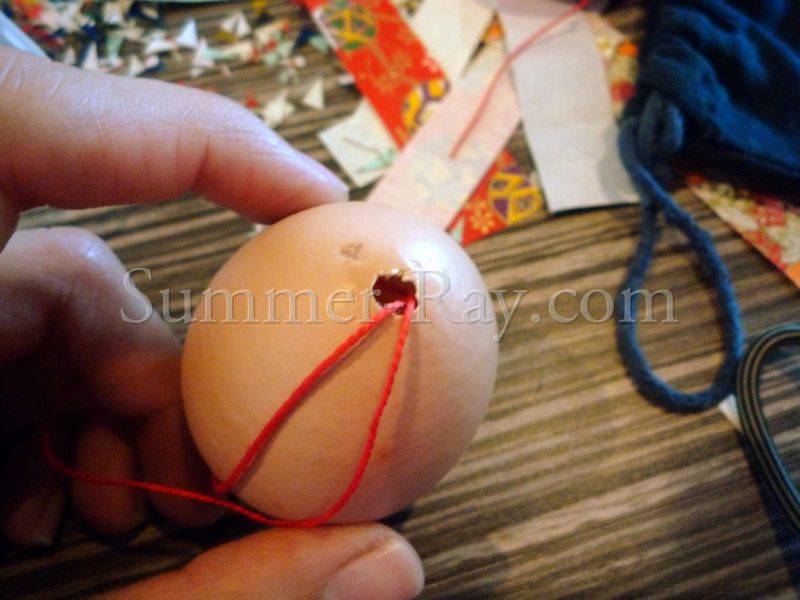
When the egg is lifted up by the string, the toothpick will remain in the egg shell.
Decorate the egg with Washi paper.
 |
| Ready to be decorated |
~ Back on track ~
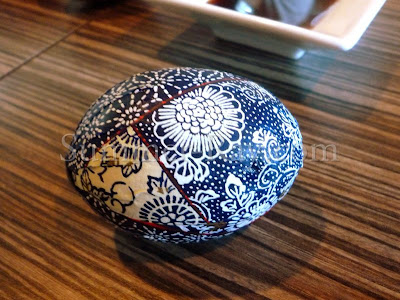
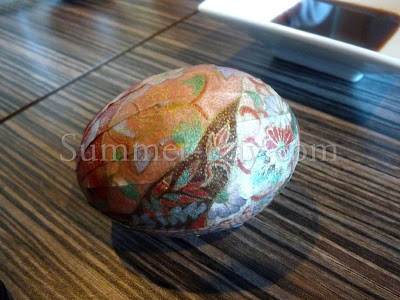
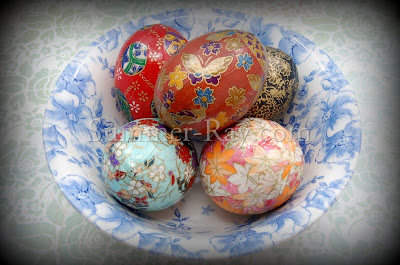
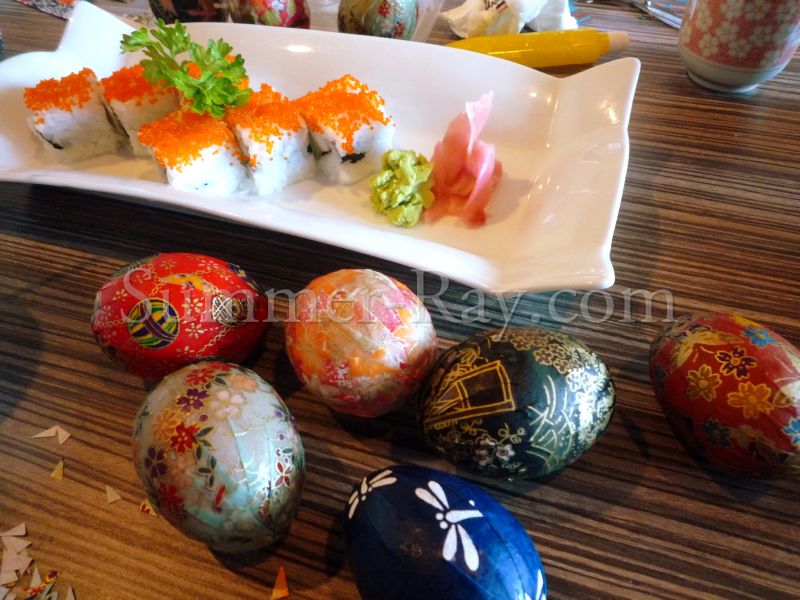
I managed to decorate six eggs during the 2.5 hour workshop, which was held in a Japanese restaurant just before lunch. :-)
These are the eggs I made.
 |
| My Washi eggs |
Let the eggs dry overnight.
Hot tip: When the eggs are dry, use a teaspoon to smooth away any remaining creases.
 |
| Smoothing creases away with a spoon |
Next, apply varnish or lacquer on the eggs. This covers any imperfections and gives the eggs a lovely sheen and polished look.
Tip: It is better to apply several light coats of varnish or lacquer over a period of time than a large amount at one go. So apply a light coat, let it dry and apply another coat, and so on.
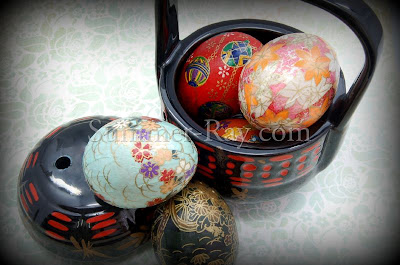
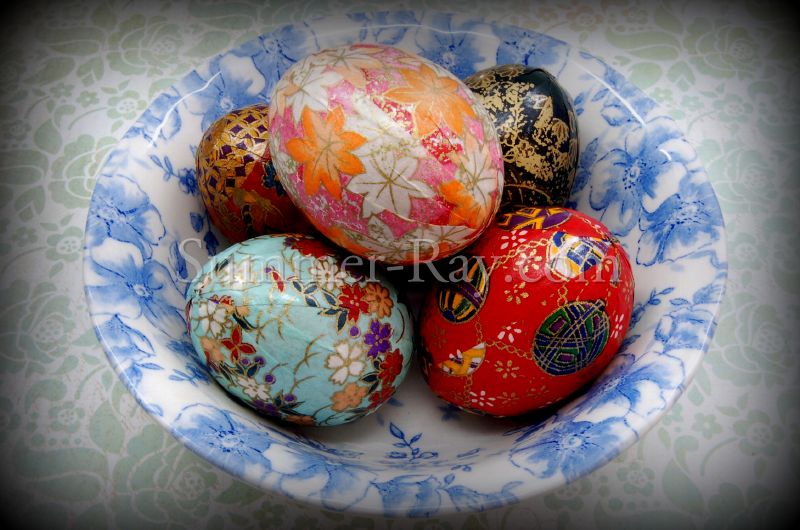
Last of all, arrange your
eggs in a bowl, egg cups, a nest, a basket, around a vase of flowers or anywhere else you desire (hang them on your favourite potted plant or tree if you made egg baubles).
Have fun making your own Washi eggs! :-)


 One last tip before I end: Keep the unused strips of paper, these can be used to make a Washi egg in a collage of paper designs.
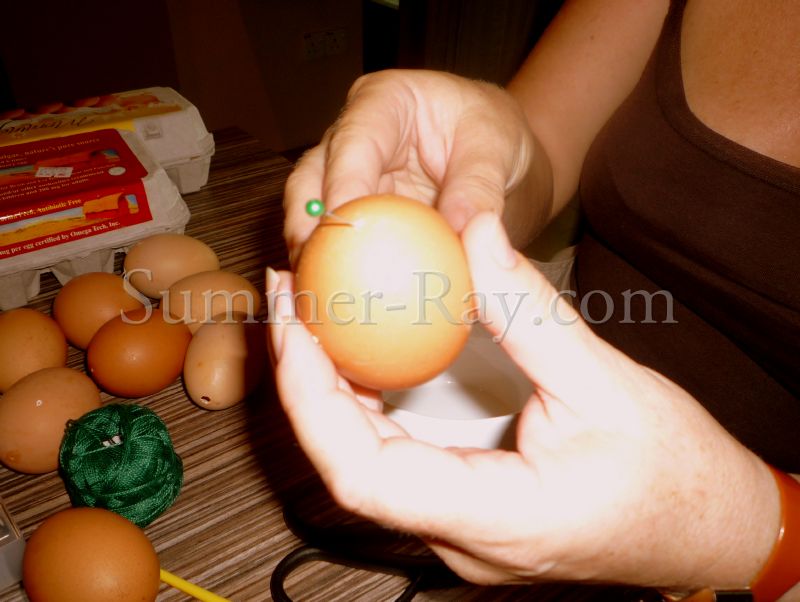


Thomas Fletcher
Great article. I found it very helpful.